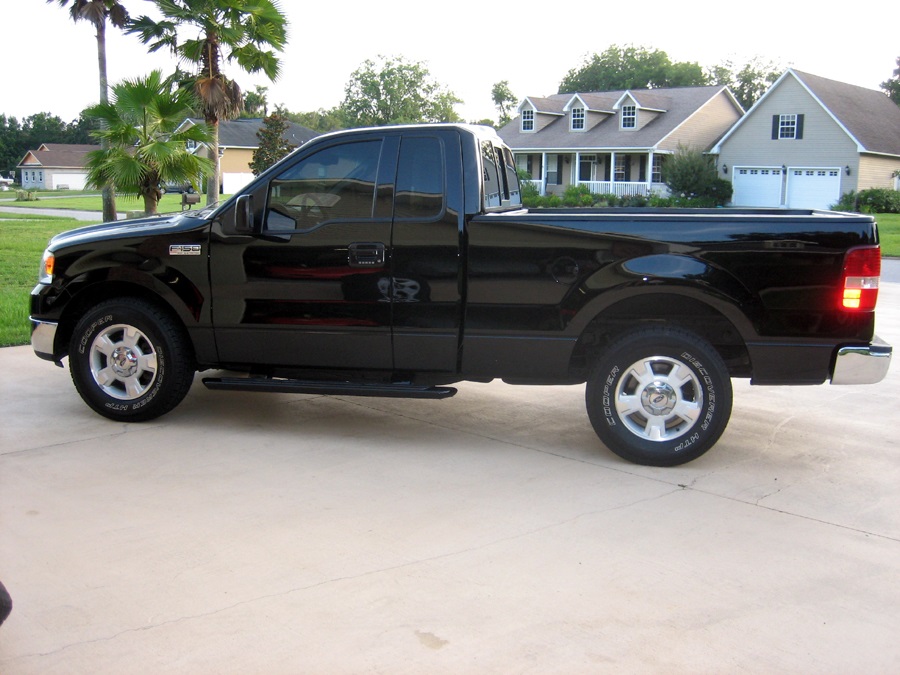
We picked this 2004 Ford F150 up at the Tampa Machinery Auction in December of 2014, drug it out of a field and restored it
as a gift for my father.
|

|
Shown here is the finished product after all the bodywork had been repaired, fresh paint and new wheels and tires scored
from a 2010. The spare tire was shredded and burned, then mounted back under the bed so we purchased a new full-size
spare wheel and tire as well.
Scroll further down to see before restauration pictures and follow the work done to resurrect this beautiful truck.
|

|

|
|
Finishing touches included new wiper blades, a billet grill insert, and a rear hitch receiver step and lock.
|

|

|

|
We picked this orphaned workhorse up at the Tampa Machinery Auction in December of 2014. She was obviously a fleet truck
as evidenced by the excessive scratches and dents. We had a special plan for her if we could buy in low enough to offset the
risk of what problems might lurk beneath that hood. With a low initial spend ceiling we came in aggressive on our bids and
scarred away several would-be buyers to close the deal.
|

|

|

|
The interior was horrendous! The carpet was completely destroyed and the seats were filled with spilled coffee and cigarette
tar. After removing the seats and old carpet the floor was swept and scrubbed, new carpet installed and hours were spent
washing and rinsing down the seat before water rat clean from them. It took two weeks of sitting in the hot garage before all
the water was dried out of them and they could be installed. If you look closely you can see the new door speakers installed in
place of the stolen factory units. Afterwards we added some Ford logo floor mats and wheel cover.
|

|

|
|
Fleet vehicles are generally meticulously maintained so my hope was if there was a serious problem with her that they’d thrown
in a lot of new parts trying to find a remedy. On the way home we noticed that she started and idled pretty well but would stutter
and die after warmup. After searching the cabin I found a piece of paper tucked away in the middle seat that contained a list of
parts and work done over the past twelve months—pay dirt! This would go a long way in helping me eliminate costly experiments;
so I started with the basics, filters, fluids, plugs, wires, coils, throttle body, etc.
|

|

|

|
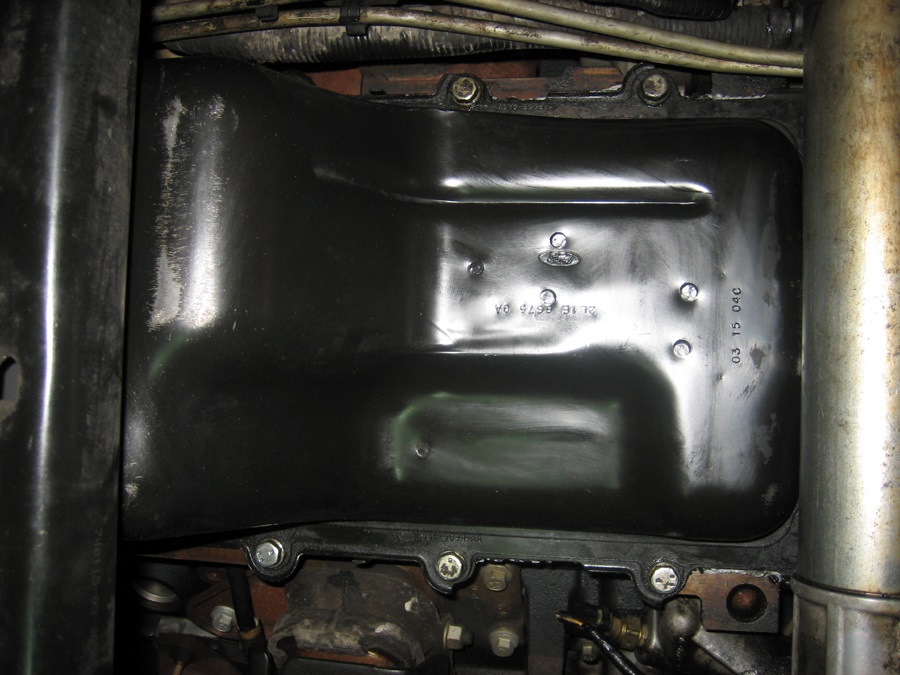
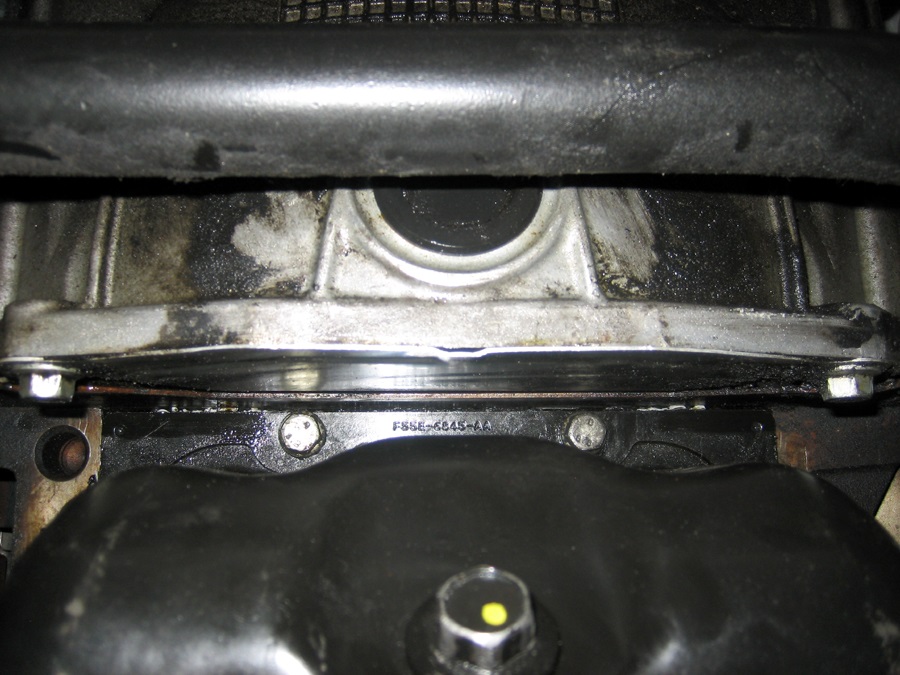
Thanks to a removable crossmember beneath the motor, access to the oil pan was fairly straightforward.
|

|
|
|
Inside is a relatively clean motor sporting a new oil pump.
|

|

|

|
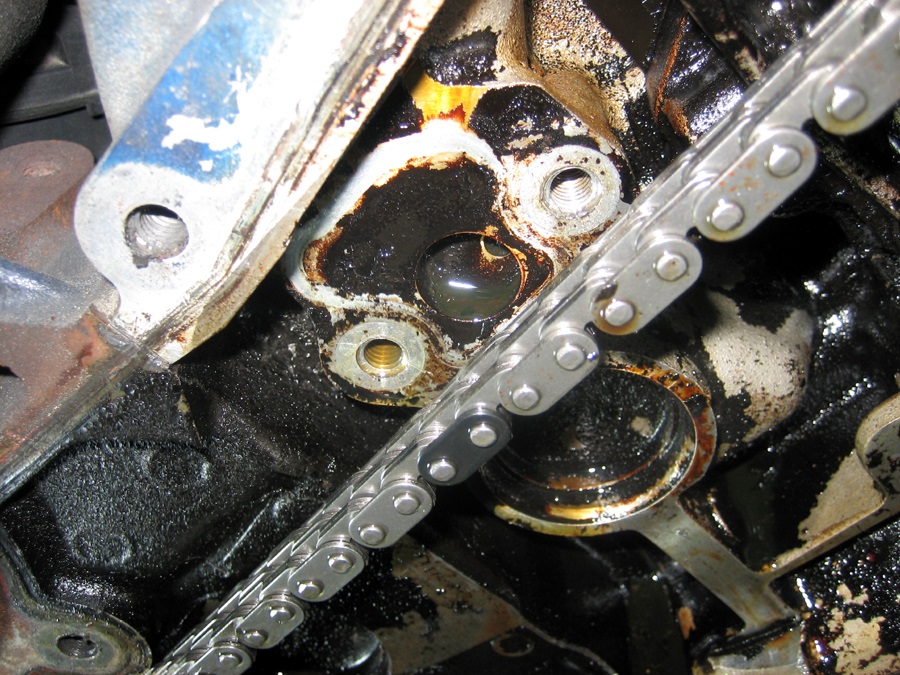
Lying in the bottom of the pan were several chunks of plastic which turned out to be from chain tensioners replaced weeks
before. Since the problem only shows itself after warmup I knew it was most likely the weight of the oil (5W 20) so I tried
shimming up the oil pump return spring. This works on Chevy’ so it was worth a shot. Unfortunately, it had some effect but not
as much as hoped for; allowing it to idle most of the time when hot but after it still wouldn’t hold after driving for twenty minutes.
|

|

|

|
Next up I switched out the oil to a heavier single weight and used an additive to help with valvetrain noise. This fixed the idle
issues even when warm and on the first trip out she ran fine even when sitting at a light, in gear and with foot on the break.
Then after a couple days of driving she began stuttering and stalling at lights again. This only happened below 650 RPM so I
knew we were close. I tried one of the Hypertech programmers in hopes it would allow me to play with idle speeds but these
very little tenability and this one made the motor lose power and run horribly. I had to revert to the factory tune after the first
drive—don’t waste your money on these!
|

|

|
|
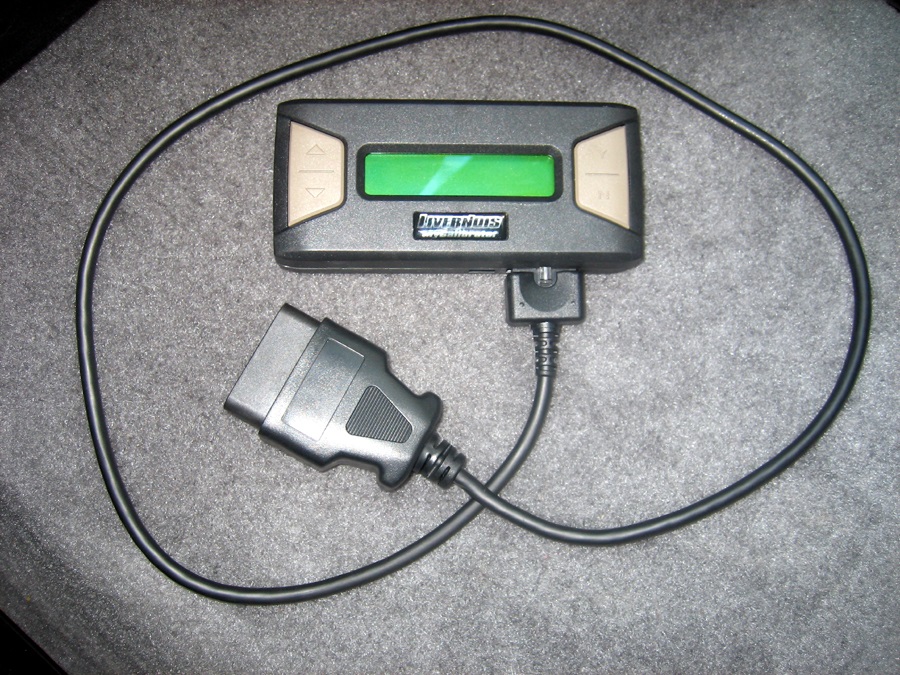
With no help or guidance from Ford—the Brandon Ford guy we spoke with out-and-out lied about these 3-V motors having any
sort of problems—we turned to the folks at Livernois Motorsports for their lock-out and programmer kit. At $720 shipped it’s a
lofty price to pay but the other side of that is the thousands the dealerships and shops charge to explore and fix nothing at all.
Here are shots of the driver’s side after removing the valve cover. As you can see the phaser and solenoid are new. A quick
check of the screens on the side of the solenoid show it’s clean with no abstractions.
|

|

|

|
We noted an extremely loose timing chain on this passenger side cam leading us to believe something was broken inside the
timing cover which is a medium difficulty task requiring patience and a couple special tools. The harmonic balancer that is made
to not fit most pullers already on the market—look closely and you’ll see we had to sacrifice an off-the-shelf puller by cutting out
the ends of the perimeter bolt slots. Once fitted to the larger radius bolt pattern removing the balancer required little effort.
After removing the power steering pump and timing cover bolts we dropped the oil pan, loosened the driver side valve cover and
Voila!
With the cover off we could see a large crack in the tensioner and what appears to be a collapsed solenoid leaving excessive
play in the chain.
|

|

|

|
The driver side tensioner actuator solenoid was bad so it was replaced. If you can depress the solenoid by hand all the way in
then it’s bad as it should only depress about half way. Before mounting we removed the tarnish buildup from its mounting point.
|
|

|
|
The passenger side tensioner actuator solenoid was good but we replaced it with our kit—after tarnish cleanup of course.
|

|

|
|
Next up was the installation of our Livernois Camshaft Phaser Lockouts. With the one long bolt left in place the cover was
rotated around—releasing the sprung check valve—and the anodized aluminum lockout block was inserted in the second hold
clockwise. This is the tightest fitting slot of the five. Afterwards, the check valve was reinstalled as the cover was relocated
and the bolts torqued in place at 120 inch pounds. Note the area of the spring on the back that has to be carefully pried around
one of the bolts as it is inserted.
|

|

|

|
After finding a loose chain, broken tensioner and bad solenoid on the driver side we had hoped the tight chain on the passenger
side meant all was well there, however, we found a broken vein in the Camshaft Phaser as illustrated here. Since this is the
location we need to install the lockout we relocated one of the good veins and its retainer spring to make it work. Since the
lockout circumvents the Phaser movement handled by these veins then missing one shouldn’t be a problem.
|

|

|

|
Before buttoning up the timing set we had to do some cleanup and repair work to the cover. Notice how the passenger side
chain had worn away a significant portion of the aluminum on the inside of the cover. This was due to excess slack which
we presume was a broken guide as evidenced by the black plastic found in the oil pan and RTV gasket around the edges of
the cover. Likewise, the exterior lip of the front seal was chewed up so we pressed in a new seal and drilled out and repaired
a stripped oil pan bolt hole as shown here. Most likely a novice mechanic used an impact wrench and over torqued the bolts,
which usually doesn’t fare well in an aluminum base.
|

|

|

|
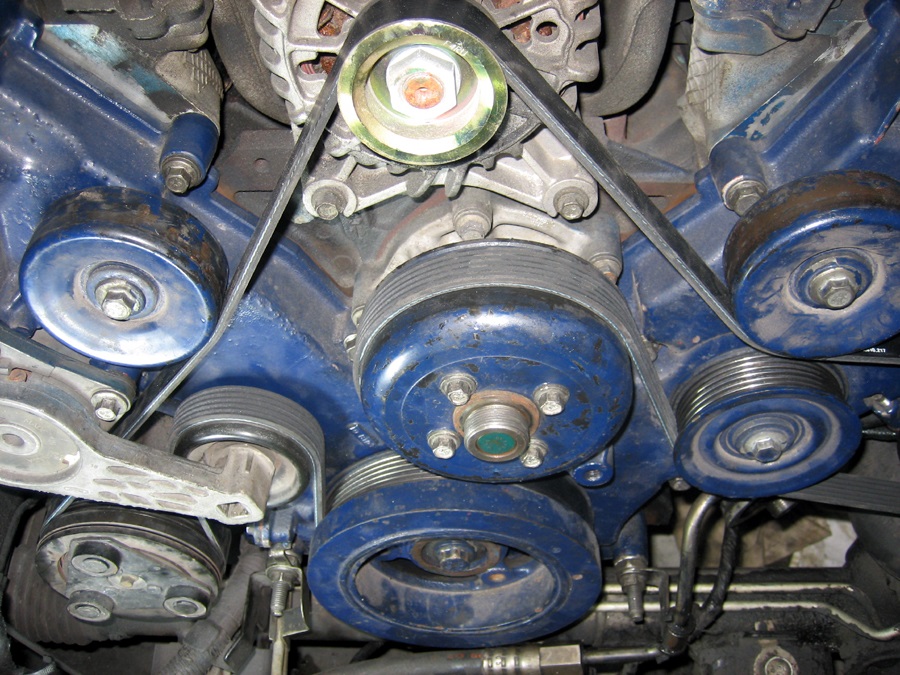
Here we have the timing cover installed followed by the accessories and serpentine belt and finally, the entire engine bay is
buttoned up. She’s dirty but completely functional—no more noise and idles great!
|

|
|

|
After all the mechanical work was completed we flashed the factory computer using the Livernois Motorsports supplied
programmer. Afterwards, she fired right up and ran great—no more noise!
|
|

|

|
Now on to the bodywork and the first order of business was replacing the front bumper, lower valance panel and fog lights.
Here’s a shot of the frontend fix but what you can't see well in this picture are the fourteen dents and dozens of scratches all
over the body. The driver's side was by far the cleanest. Being a construction fleet truck she was driven through a lot of brush
and it shows. Notice the white looking bedrails; the plastic had been so badly sun bleached it had turned from black to white.
A little trick I learned was to use a heat gun to bring the plastic back to a soft but not quite liquid state. This bonds the structure
again and pulls the black plastic coloring back to the surface as shown in the before and after shot.
|

|

|

|